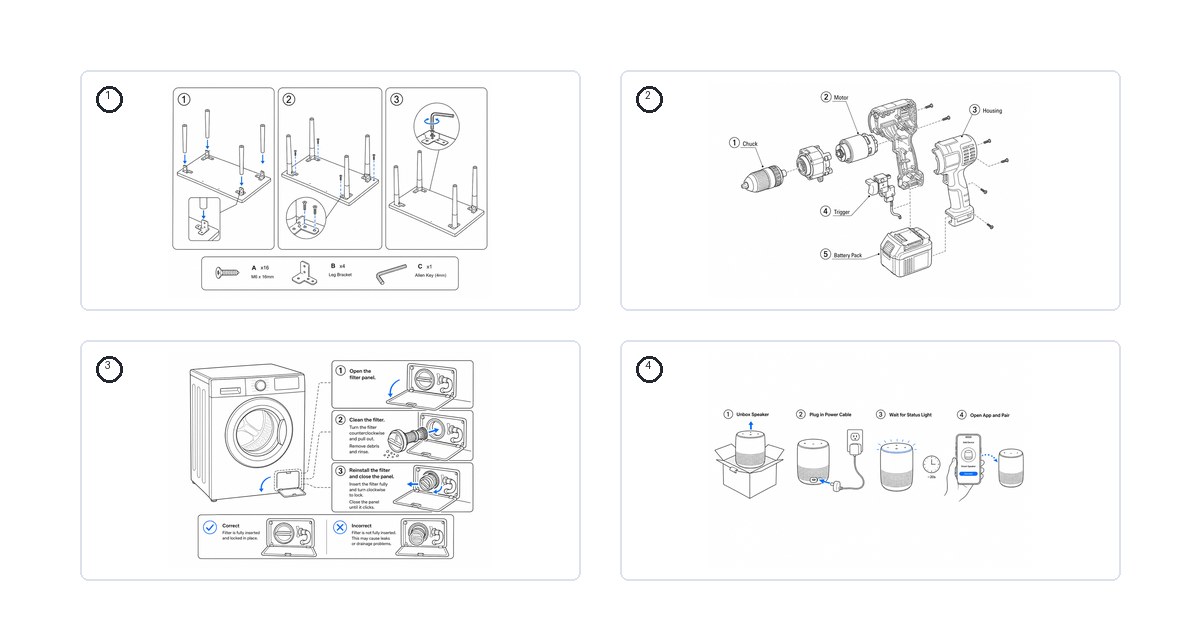
Assembly and Troubleshooting Guide Examples by Product Type
How to illustrate assembly and troubleshooting guides for common products — beds, cribs, grills, washing machines, water softeners, and more.
A furniture brand's support inbox tells the same story every Monday morning. One customer cannot tell screw A from screw B because they look identical in the photo. Another swears the headboard bracket is missing when it is actually bagged with the slats. A third has assembled the bed frame upside down and now the drawer will not slide. None of these are product defects. They are illustration failures — the printed sheet showed the whole frame at once, with a hardware list in six-point gray text and no arrow telling anyone which way the rail faces.
The fix is not more words. It is the same visual playbook applied product by product: numbered steps, one figure per step, a blue arrow on the action, hardware shown at the size the reader actually needs, and a correct-vs-incorrect panel exactly where people get it wrong. The categories change — a trampoline net is not a washing-machine filter — but the visual grammar stays constant.
Start from the Assembly Instruction Illustration Generator or the Troubleshooting Guide Illustration Generator.
The visual playbook that works for every product
Before splitting by category, fix the grammar. A good assembly or troubleshooting figure does the same five things regardless of what is on the page:
- One action per step. If a step contains "attach the rail and tighten both bolts and check alignment," it is three steps. Split it.
- One figure per step, numbered. The number on the figure matches the number in the text. Readers should never have to guess which drawing belongs to which line.
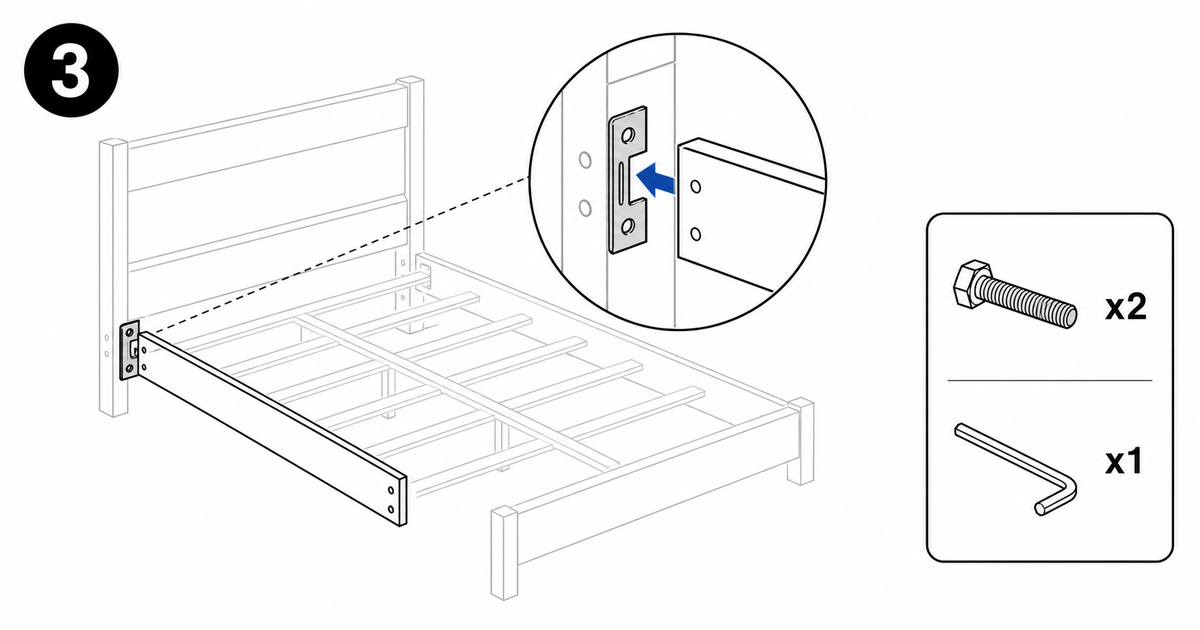
- Blue arrows for motion. Reserve one arrow color for "do this now." Insertion, rotation, lifting, and sliding each get an arrow that matches the real direction of travel.
- Hardware shown at usable size. Screws, bolts, dowels, and brackets appear next to the step that uses them, with quantities, not buried in a master list on page one.
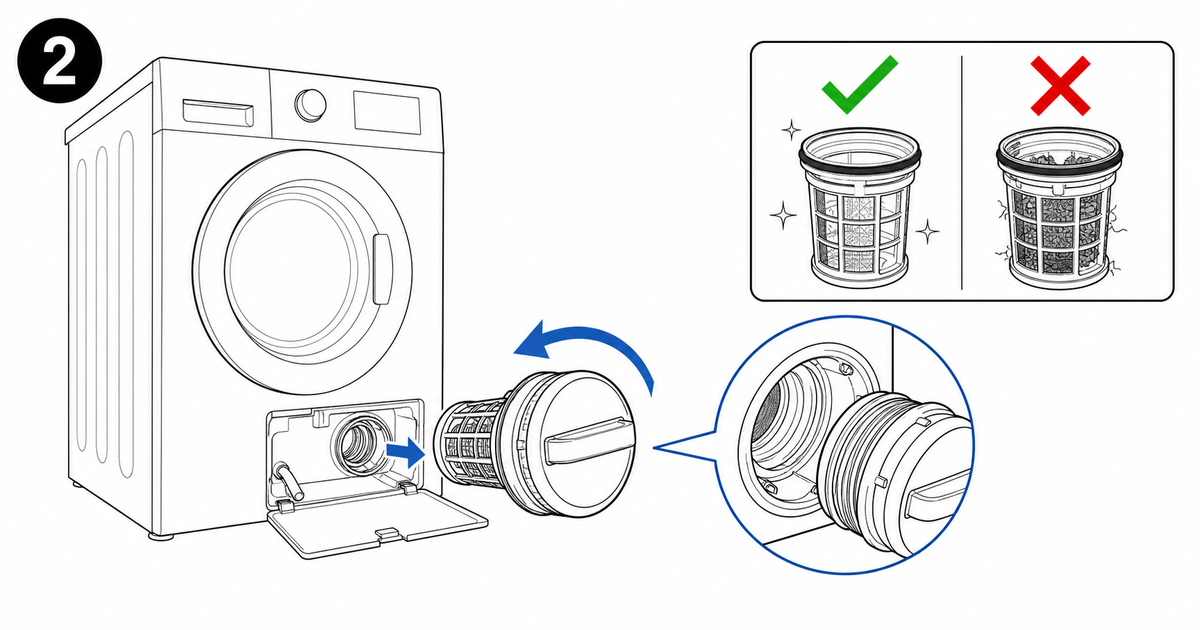
- A correct-vs-incorrect inset where it matters. Only at the steps people actually fail — orientation, seating, locking — show the right state and the wrong state side by side.
Keep everything else quiet. Lighter line weight for the rest of the product, no marketing shadows, no reflections, no decorative background. The eye should land on the part being touched and the arrow showing the motion.
Assembly guides by product type
Flat-pack and multi-part products fail on two things above all: orientation and fastener clarity. The reader needs to know which way a part faces and exactly which piece of hardware goes where.
Beds and frames. Show rails, slats, headboard, footboard, and brackets as separate, recognizable parts. Give the hardware bag its own callout with quantities — readers should be able to count out screws before they start. Use orientation arrows on any rail or panel that has a front and a back, and add a correct-vs-incorrect inset for the one joint that is easy to reverse. Start from the Bed Frame Assembly Instructions Generator.
Cribs and bunk beds. Same structure, with two additions that carry real safety weight: guard rails and ladders. Show the guard rail seated and locked, not just resting in place, and finish with a stability check figure — a hand pushing the assembled frame to confirm it does not rack. Make the final-state drawing unambiguous.
Grills and outdoor gear. Label the burners, legs, side panels, and the firebox, and show fastener order so the frame goes square. Outdoor products often ship with several similar-looking bolts; a small hardware inset that distinguishes long from short bolts prevents the most common rework.
Trampolines. Frame, springs, and net each get their own step group. Spring installation is the danger zone, so show the spring tool and the direction of tension with a clear arrow. Net poles need orientation arrows and a final figure confirming the enclosure is fully zipped and seated.
For any of these, the Furniture Assembly Instructions Generator and the general Assembly Instruction Illustration Generator produce the base figures, which you then refine step by step.
Troubleshooting guides by product type
Troubleshooting content works best when each fix is a numbered figure, not a wall of text. The job changes slightly from assembly: instead of showing how parts come together, you show where the symptom lives and what the correct state looks like once it is resolved.
Washing machines. The classic ticket is "won't drain." Make it three figures: open the filter panel at the base, clear the filter (with a correct-vs-incorrect inset for a clogged versus clean filter), and check the drain hose for kinks. A close-up callout on the filter housing saves a paragraph of description.
Water softeners. "No soft water" usually maps to salt, brine line, or regeneration. Show the brine tank salt level with a clear fill line, a close-up of the brine line connection, and a step that triggers a manual regeneration cycle. The correct-vs-incorrect inset here is salt bridging — show a healthy salt bed versus a crusted one.
Water heaters. "No hot water" breaks down into pilot, thermostat, and breaker. Each gets a figure: the pilot assembly with the ignition point arrowed, the thermostat dial at its correct setting, and the breaker panel with the relevant switch indicated. Keep the figures cautious and route the final sheet through a safety reviewer. See the Water Heater Troubleshooting Guide Generator.
Printers. Paper jams and cartridge reseating are the two highest-volume tickets. For jams, show the access door open with an arrow tracing the direction to pull the sheet — pulling against the feed path tears paper and leaves fragments. For cartridges, show the carriage position and the click-to-seat motion, with a correct-vs-incorrect inset for a cartridge that looks installed but is not latched. See the Printer Troubleshooting Guide Generator.
Each of these can start from the general Troubleshooting Guide Illustration Generator and then be tuned per symptom.
A prompt template you can adapt
The same prompt skeleton works for assembly and troubleshooting. Swap the product, the steps, and the failure point:
Create a clean line-art guide figure from this product reference.
Style: black and gray line work on a white background, no shadows, no reflections, no logo, no brand text.
Show step N of the sequence: [the single action for this step].
Add a blue arrow showing the [insertion / rotation / lifting / sliding] direction.
Include a small hardware callout listing the fasteners used in this step with quantities.
If this is a step people get wrong, add a correct-vs-incorrect inset: left shows the correct seated state, right shows the common mistake.
Leave margin below for a numbered caption.
Generate two or three variants per step, pick the one closest to the real product, then fix arrows and labels on a second pass. That is faster than chasing one perfect figure in a single try.
Common mistakes to avoid
The same errors appear across every category:
- Showing the whole product when the step only concerns one rail, one filter, or one latch.
- Burying hardware in a single master list instead of next to the step that uses it.
- Arrows that point near the action but not exactly at the contact point.
- Skipping the correct-vs-incorrect inset on the one step where everyone fails.
- Labels so long they break the layout after translation.
- Letting generated art invent logos, model numbers, certification marks, or dimensions.
- Leaving marketing shadows and reflections that hide the part the reader needs.
Good guide art is selective. Keep the silhouette, the part being touched, and the action cue. Everything else fades to lighter lines or disappears.
Keeping one consistent style across a library
A support library reads as one brand only when every figure shares a look. Lock the line weight, the arrow color and shape, the callout style, and the inset layout once, then reuse them. When a part changes — a new bracket shape, a relocated filter — you edit the prompt and regenerate the affected figure rather than redrawing the set. Archive the prompt and reference image alongside each export so a future update is an edit, not a rebuild.
Browse every tool on the Tools page, refine results in the full workbench, and export PNG for single-channel articles or SVG for figures that appear at multiple sizes.
FAQ
Should assembly and troubleshooting figures use the same style?
Yes. The visual grammar — numbered steps, blue action arrows, hardware callouts, correct-vs-incorrect insets — is identical. Only the subject changes. Sharing the style keeps your whole library coherent and lets readers transfer what they learned from one guide to the next.
Where exactly should a correct-vs-incorrect inset go?
Only on steps people actually fail: orientation (a rail installed backward), seating (a filter or cartridge that looks installed but is not latched), and locking (a guard rail resting instead of secured). Adding the inset everywhere dilutes its signal. Reserve it for the genuine failure points.
PNG or SVG for these guides?
Use PNG when the figure lives at one size on one channel, such as a single help-center article. Use SVG when the figure appears at multiple sizes — a printed manual plus a web help center, or a full sheet plus a thumbnail — so arrows and labels scale without re-rendering. When unsure, default to SVG; downgrading is one click.
Can I generate a whole numbered sequence at once?
Generate each step as its own figure so you can revise one without disturbing the rest, but keep the same style anchor across them. Archive the prompts together as a set, so if step three's part changes later you can regenerate just that figure and it still matches steps one, two, and four.
Related: Bed Frame Assembly Instructions Generator, Furniture Assembly Instructions Generator, Water Heater Troubleshooting Guide Generator, Printer Troubleshooting Guide Generator.
Author

Researcher · University of Arts in Poznan
Davie Chen is a researcher at the Faculty of Animation and Intermedia, University of Arts in Poznan, studying generative AI for scientific figure creation, patent illustration, instruction graphics, and manuscript drafting. ManualFig AI is one of the research-to-product tools built from this work.
View author profileCategories
More Posts

Manufacturing Assembly Instructions: Format, Examples, and How to Illustrate Each Station
What a manufacturing assembly instruction must contain, how to lay out one step per page, three worked station examples (torque, orientation, inspection), and a template you can copy.
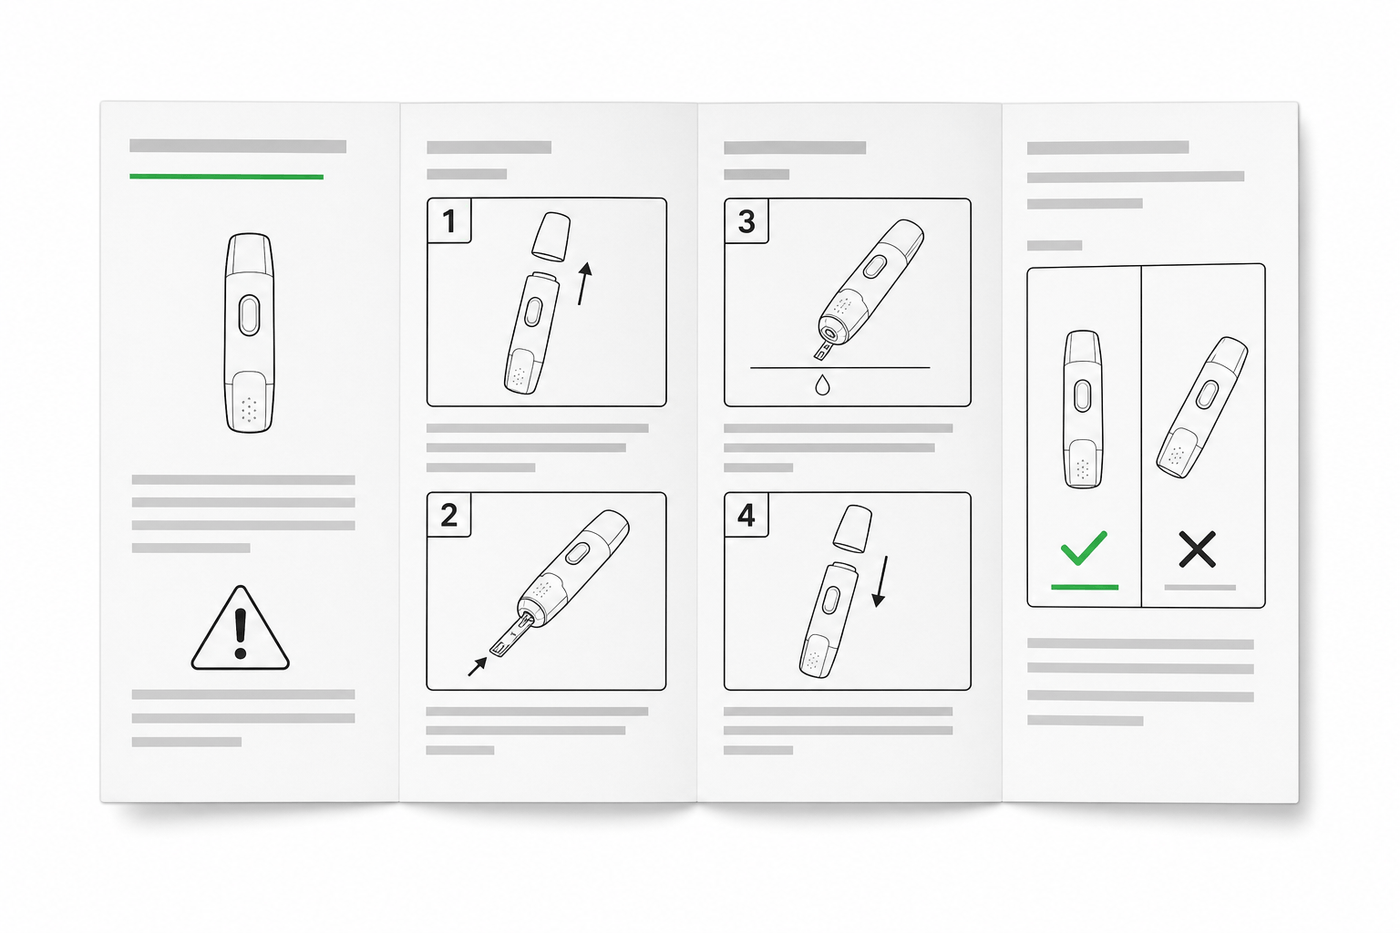
IFU Design Guide: Layout, Symbols & Examples
Practical IFU design guidance for medical devices: page layout, ISO 15223-1 symbols, warning panels, illustrations, and a reusable section template.
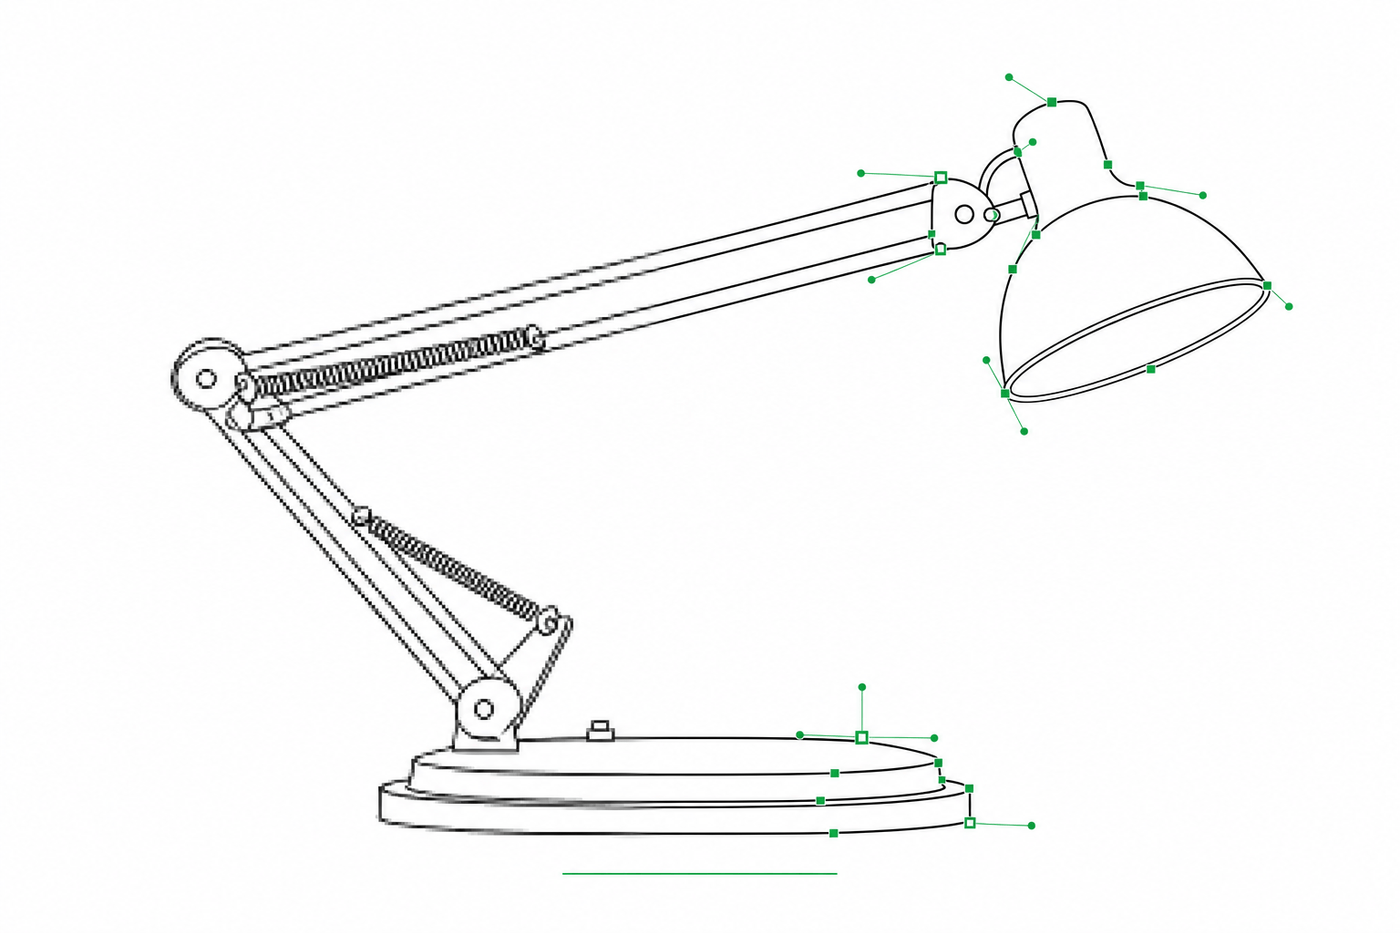
Image to SVG for Illustrator: How to Get Editable Strokes for Technical Line Art
Why many image-to-SVG conversions arrive in Illustrator as filled outlines you can't restyle — and two workflows that produce stroke-based, centerline-style SVG line art with adjustable line weights.